What is especially cool about this recipe is that I used surprise spaghetti squash from my garden. I planted melons and one plant turned out to be spaghetti squash!
What you will need:
Spaghetti Squash
Smoked Tofu
2 Whole Peppers
Sauce ingredients:
1/2 cup tomatoe sauce/paste
1/2 cup butter
1/2 cup cream cheese or soft goat cheese
1 tbsp tamari
How to do it:
Step 1: Cut the squash lengthwise and remove seeds from squash.
Step 2: Bake spaghetti squash at 400 degrees in a pan with a bit of water for 1 hour (you may need to add water again halfway through).
Step 3: Alongside, bake seeds and smoked tofu in a 1/4 cup butter.
Step 4: At about 35min, add peppers.
Step 5: At about 45 minutes, you’ll need to start frequently stirring the squash seeds, tofu and peppers frequently to prevent burning.
Step 6: Meanwhile on the stove top make the sauce.
Step 7: Scoop out the spaghetti squash to separate.
Step 8: Add 1/4 cup of butter to the ‘spaghetti’, plus drizzle olive oil on top!
Step 9: Fluff up with a knife and fork.
Step 10: Put spaghetti squash in bowls, and with baked seeds, tofu and pepper, top with sauce.
Optional: Add more ‘tang’ by serving with capers and olives on the side!
Besides the fact that this recipe makes a great ‘prep ahead’ breakfast, I just love that I can create something with avocado that doesn’t brown (thanks to gelatin’s seeming preservation power…the lime likely helps a bit too)!
Great way to extend the life of an avocado, before it turns brown and stringy!
This recipe has easily stays fresh, green and delicious for as many as 5 days in the fridge, although we usually eat it up within 3 days!
What you will need:
1 whole avocado
1 cup water
1/2 cup coconut milk
1/4 cup protein powder
the juice and rind of a lime
1 tsp or more of stevia to sweeten
1/2 cup hot water (dissolve 2 TBSP gelatin in it)
How to do it:
Step 1: Put water in a pot on medium heat and dissolve the gelatine in it.
Step 2: Put everything in a blender or bullet.
Step 3: Pour into a bowls and cover with plastic wrap.
Step 4: Refrigerate overnight.
What you will need:
1/3 cup coconut oil
1/3 cup cream cheese or soft goat cheese
1/3 cup butter
3 Tbsp powdered erythritol
3 drops plain stevia extract
the juice of up to 4 limes (depending on how sour you like them!)
the rind of 1 lime
How to do it:
Step 1: Put all ingredients in a saucepan on medium and stir with a fork until melted (except lime juice and rind)
Step 2: Remove from heat.
Step 3: Blend with juice and rind in a blender until silky smooth.
Step 4: Pour into molds.
Step 5: Store in the freezer.
For the white chocolate lover, not my favourite, but the kids LOVE them!
What you will need:
1/2 cup cocoa butter
1/2 cup creamed coconut
3 Tbsp erythritol
3 drops of toffee flavoured stevia (optional)
scrape the inside of 1 vanilla bean (2 tsp vanilla extract or 1 tsp vanilla powder)
How to do it:
Step 1: Put all ingredients in a saucepan on medium and stir with a fork until melted.
Step 2: Remove from heat and blend in a blender until silky smooth.
Step 3: Pour into silicone molds.
Step 4: Store in the fridge.
You can send the kids to school with these babies, because they are solid at room temp.
For some they are not so skinny, but if you digest dairy just fine, then these babies are a great low carb treat!
How to do it:
1 cup cream cheese or goat cheese
1/2 cup butter
1 cup fresh parmesan grated finely (save 1/2 for rolling in)
1/4 tsp salt
2-4 Tbsp fresh herbs (or 2-3 tsp dried)
How to do it:
Step 1: Put all ingredients in a saucepan on medium and stir with a fork until melted.
Step 2: Remove from heat and refrigerate for 30 min.
Step 3: Roll the dough into balls.
Step 4: Roll in finely grated parmesan.
Step 5: Store in the fridge.
These are a great option when you are in the mood for peanut butter and chocolate, but you’ve run out of cocoa – especially if you once bought the nibs and have no idea what to do with them!
What you will need:
1/2 cup peanut butter
1/3 cup coconut oil
2 Tbsp cocoa nibs
2 Tbsp powdered erythritol
1 – 3 drops stevia extract
1/4 cup coconut powder or cocoa powder
How to do it:
Step 1: Put all ingredients in a saucepan on medium and stir with a fork until melted.
Step 2: Remove from heat and pour into moulds.
Step 3: Store in the fridge.
If I was to binge on commercial candy, I would choose Nielsons chocolate macaroons.
Oh my word the crunch, the Chocolate, the yum!
Honestly, I could never not eat the whole box and then want another.
That’s how much I used to LOVE these babies!
I couldn’t find the ingredients anywhere online, so I had to create this recipe from memory.
If fact, a lot of places online say that this product is discontinued and it isn’t listed on the Neilson website.
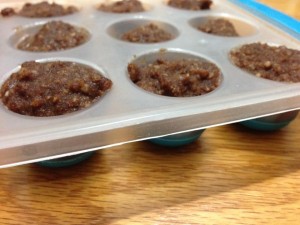
Although my version is a much darker chocolate version, I think you will appreciate the resemblance to the taste and texture of the Neilson recipe.
And of course, mine has no crappy refined oils or sugar to speak of : )
If you want to boost your metabolism, use coconut oil instead of butter (in conjunction with a low carb diet)!
What you will need:
1 cup coconut oil or butter (I used butter in the photos)
1 cup cocoa powder
1/2 cup ground almonds (or you can also purchase almond meal – peeled and ground for you).
1/2 cup of ground dessicated (shredded) coconut
1/2 cup of dessicated (shredded) coconut
3 Tbsp Swerve (ground erythritol) * you could use unrefined sugar, but then it wouldn’t be a ‘skinny bomb’ – because of the high fat and high sugar content together.
3 drops plain stevia extract
Variation: cut down on the cocoa and add milk powder or coconut milk powder in it’s place for a more milk chocolate flavour (I prefer it dark)!
How to do it:
Step 1: Ground 1/2 cup almonds.
Step 2: Ground 1/2 cup dessicated (shredded) coconut (remember to leave the other 1/2 cup desiccated coconut unground to get the correct texture.
Step 3: Put all ingredients on the stove top in a pot on medium, stir until all the butter is melted and everything is blended.
Step 4: Scoop into a mould or refridgerate until you can form into balls or if you have cake decorating equipment, you could actually create the macaroon shape.
Step 5: Store in the fridge.
There are 5 things that excite me the most about eating weeds…
Weeds are incredibly nutritious, as are all green leafy vegetables. I think it’s obvious to most that greens are high-end nutrition, full of vitamins and minerals. But did you know that they are also a great source of protein too? In particular, the dandelion when you eat the whole plant (leaves, stems, roots and flowers) is a complete protein!
Weeds are no maintenance. They’re coming up whether you like it or not! Instead of resisting them or resenting how long they take to pick, instead you can take those weeds straight out of the garden and simply add them to salad at dinner. In fact once you know what you’re doing, you’ll discover that you have enough weeds in your yard, to have no need to buy any salad greens from the grocery store (other than in winter).
Weeds are free! It’s crazy to think that every day we walk past delicious, nutritious and free food, all the while imagining that it’s too expensive to really eat healthy!
If you know how to identify, harvest and cook with weeds, you’ll never have to worry about starving through a natural disaster or otherwise.
To help you get started (eating a weed that you can easily identify!), I’ve compiled a list of recipes below that you can use for your dandelion harvest!
You can make:
dandelion salad
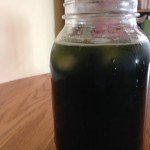
dandelion milk
dandelion tempera
dandelion juice
dandelion green powder
dandelion root coffee
Enjoy the recipes!
Dandelion Salad
What you will need:
dandelion stem
dandelion leaves
dandelion flowers
salad dressing of your choice
How to do it:
Gather 3 whole dandelion plants.
Remove the roots (put aside to make dandelion coffee).
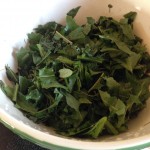
Fill your sink a quarter full with water and rinse the dandelion.
Place on your cutting board and chop into bite-sized pieces.
Place in salad bowl and toss with your favourite dressing.
Dandelion Milk
What you will need: 1 cup water (filtered or Spring)
3 tbsp dandelion seeds (you can soak them overnight if you can wait!)
optional: ice
How to do it:
Place seeds and water in a high powered blender
Blend for one minute.
Pour the milk through a nut milk bag or layered cheesecloth into a glass.
Optional: add ice and enjoy!
Dandelion Tempura
What you will need: 2 cups of clean dandelion flowers
3/4 cup of flour
1/4 cup nutritional yeast
1 whole egg
1/3 cup butter
How to do it:
Melt butter on the stove on medium in a frying pan.
Place the flower and nutritional yeast in bowl and mix evenly with a fork.
Place the egg in another bowl and whisk.
Take one dandelion flower, roll it in the whisked egg, next in the flour mixture and finally put it in the frying pan.
Repeat until the pan is full.
You may need to reduce the temperature from medium to a little less than that to keep your dandelion tempura from burning.
Dandelion Juice
What you will need:
dandelion stem
dandelion leaves
dandelion flowers
How to do it:
Gather 20 whole dandelion plants.
remove the roots (put aside to make dandelion coffee).
Fill your sink a quarter full with water and rinse the dandelion.
Place on your cutting board and chop into bite-sized pieces.
Put in your juicer.
Refrigerate juice and consume a 1/4 cup to 1/2 cup twice per day.
Dehydrated Dandelion Powder
What you will need: dehydrator
dandelion stem
dandelion leaves
dandelion flowers
How to do it:
gather 20 whole dandelion plants
remove the roots (put aside to make dandelion coffee)
Fill your sink a quarter full with water and rinse the dandelion
Place on your cutting board and chop into bite-sized pieces
Lay out all your dandelion pieces on dehydrator trays
Dehydrate until crisp
Blend in your high powered blender
Put into a glass jar and store in a cool dark place such as a basement cupboard or the freezer.
Dandelion Coffee
What you will need:
a dehydrator
dandelion root
Optional: add cream and unrefined sugar
How to do it:
Save the roots from making all the after mentioned recipes (you can store them in a mason jar unwashed and in the fridge or you can wash and dehydrate them as you go).
Lay out clean roots in the dehydrator.
Dehydrate until dry.
Chop into as small pieces as you can.
Roast in the oven at 375 degrees F until nicely browned.
Blend in the highest powered blender you have until it is a fine dissolvable powder.
Place in a clean mason jar.
When you are ready to make dandelion coffee, use 3 Tbsp or more per cup of hot water.
Optional: add cream and unrefined sugar.
Note: if your grinder won’t grind enough for your dandelion coffee to dissolve, no worries, just strain your brew after letting it sit for a bit (a Bodum coffee maker would work well).
p.s. you can put your oven on the lowest setting to use it as a dehydrator to make the root coffee or the dandelion juice powder.
Have you tried eating dandelion yet? What is your favourite dandelion recipe?
Over the years on the path to reclaiming domestic arts and traditional wisdom, my vision and focus, pretty much has never left the kitchen.
These days though, I’m starting to think more and more about how to grow and access food, without relying on a grocery store – even the organic ones.
Move over wheatgrass, ‘weed grass’ is in the house!
It’s not that I don’t appreciate the convenience, it’s just that, I want to know for sure, that I know how to grow and access appreciable amounts of food for my family – anytime.
Whether you want to save money, access more nutrition or gain survival skills, you’re going to love discovering the garden you didn’t even know you have!
And no, it’s not about going into the woods and foraging (although you could), it’s a little closer to home…. right outside your door in fact!
I’ve been having so much fun with it and it lights me up so much, that I’m going to share the process with you, as I learn it, so that we can both grow in knowledge together.
I get so excited when I find really cool stuff…. I just can’t help myself from sharing it!
In this case I am sharing with you, something you already have!
Something you may even be trying to get rid of.
You should have seen the look of trepidation on my husbands face when I offered him a cold glass of ‘weedgrass’ juice tonight before dinner!
I decided to create video to show you what I’m learning, so that you can learn along with me!
It’s pretty cool isn’t it, that there is such an abundance of one of nature’s most nutritious foods (leafy greens) right outside your door.
It’s not only super accessible, but it’s completely free for everyone.
While you should invest in a weed book (just to make sure what you’re eating is actually edible) don’t worry about whether or not your weeds are perfectly pristine.
Free the Salad!
If you don’t spray your lawn or garden, it’s likely that even weeds growing by the side of the road are much cleaner then the conventional food at the grocery store (not to mention how often we eat commercially or organically grown food situated at the edge of the highway and don’t even know it)?
Remember, it’s earth, not dirt!
If you want to learn how you too can identify common edible weeds, instead of wasting them, click here to buy Katrina Blairs inspirational life-saving and practical book!
On another note, and yet in perfect timing…. did you know that according to Chinese medicine, it is liver season? If you want help loving up your liver this year, then check out this free training that will give you the knowledge of how to eat to nourish your liver this spring.

 Step 6: Meanwhile on the stove top make the sauce.
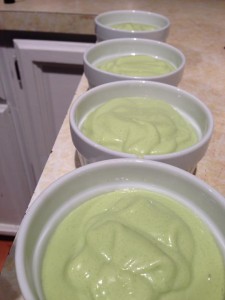 This recipe has easily stays fresh, green and delicious for as many as 5 days in the fridge, although we usually eat it up within 3 days!
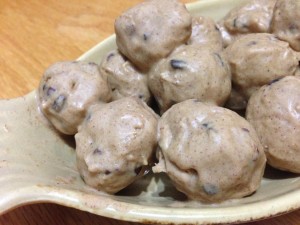 These are a great option when you are in the mood for peanut butter and chocolate, but you’ve run out of cocoa – especially if you once bought the nibs and have no idea what to do with them!
 How to do it:

 What you will need:
 What you will need:
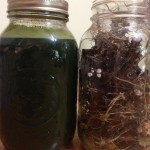 How to do it:
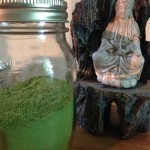 How to do it:
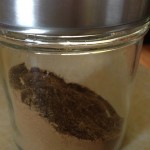 How to do it: